Japanese whetstones are the absolute best way to sharpen kitchen knives. They are used for sharpening Samurai swords. Enough said.
Learning to sharpen with whetstones is a bit like learning to ride a bicycle. At first it can be frustrating. You might fall off a few times. But as soon as you get the hang of it, that’s it. You love it. And all your knives will be super sharp. Forever. For free.
At TOG, we are on a mission to get everyone to experience the joy of using a quality Japanese kitchen knife. We believe that part of owning one is looking after it properly and keeping it sharp.
ALL knives get blunt with use. In fact, the sharper the knife the quicker it blunts as the edge is so thin. Blunt knives can slip sideways off food instead of cutting into it, which is why many people say they’re more dangerous. They also crush the cells of foods which can affect the flavour.
Yep. Let’s face it, a sharp knife is a joy whereas a blunt one is just annoying.
Knives sometimes get chipped too, and when your knife is chipped or blunt, you need to grind a new cutting edge.
The aim of this post is to get you from ‘beginner’ to ‘confident’ as quickly as possible. There are common mistakes people make when they are starting out which can knock confidence. I’ll highlight these so you can avoid them.
WHETSTONE GRITS
Decent Japanese ceramic whetstones make a big difference to sharpening. They produce better results AND make it easier to get those results. A hard stone works faster and is just as effective on harder steels such as those found in Japanese knives.
You can read more about what whetstones are best to buy here but for now the most important thing to understand is grit sizes. Like with sandpaper, coarser stones have larger abrasive particles and work faster. Finer stones have smaller particles and produce sharper edges. Whetstones are categorised as follows:
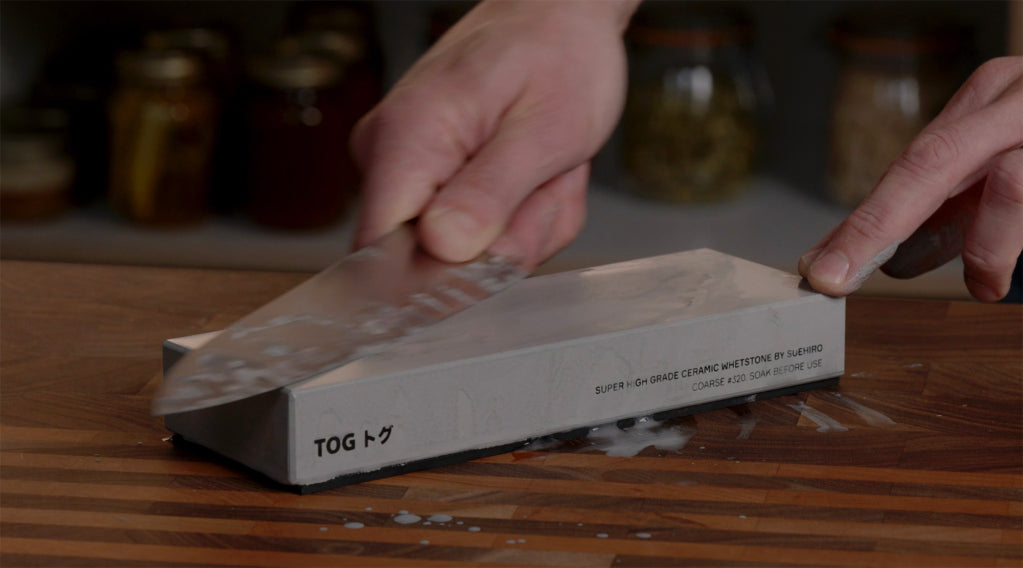
COARSE (#120 to #600 GRIT)
For grinding a new edge quickly onto a chipped or blunt knife. TOG recommends #220 or #320.
MEDIUM (#800 to #2000 GRIT)
Used after a coarse stone to make the knife sharper, or on their own for sharpening a knife that isn’t too blunt. TOG recommends #1000 as the best all-purpose grit size.
FINE (#3000 to #5000 GRIT)
Used after medium to make the blade super-sharp. TOG recommends a #4000 for a perfect kitchen-ready edge.
POLISHING (#6000+ GRIT)
For those who want ‘shaving sharp’ knives and a mirror edge, whetstones are available up to #30000. We recommend around #10,000 - beyond that you’ll pay a lot more money for virtually no difference in performance. You can also use a ‘paddle strop’ for this final step in the progression.
COARSE
▿
MEDIUM
▿
FINE
▿
POLISHING
If you’re starting out, a coarse and medium are all you need. If you just want one stone to start off with, you could get a medium if your knives are in relatively good condition or a coarse if they’re blunt or chipped.
HOW TO USE A WHETSTONE
If you follow the steps below, you shouldn't go too far wrong:
1. CHOOSE YOUR WHETSTONE
Assuming your knife is starting blunt, select a coarse whetstone to use to grind a new edge onto your knife.
If it's a knife you've sharpened before (so you won't be changing the edge angle) and the knife doesn't need too much work, you can start with a medium stone instead.
2. WET YOUR WHETSTONE
If you have a ‘soaking stone’, immerse it completely in water until the bubbles stop (about 5 minutes). If your whetstone is a ‘splash and go’ type, just splash some water on the surface.


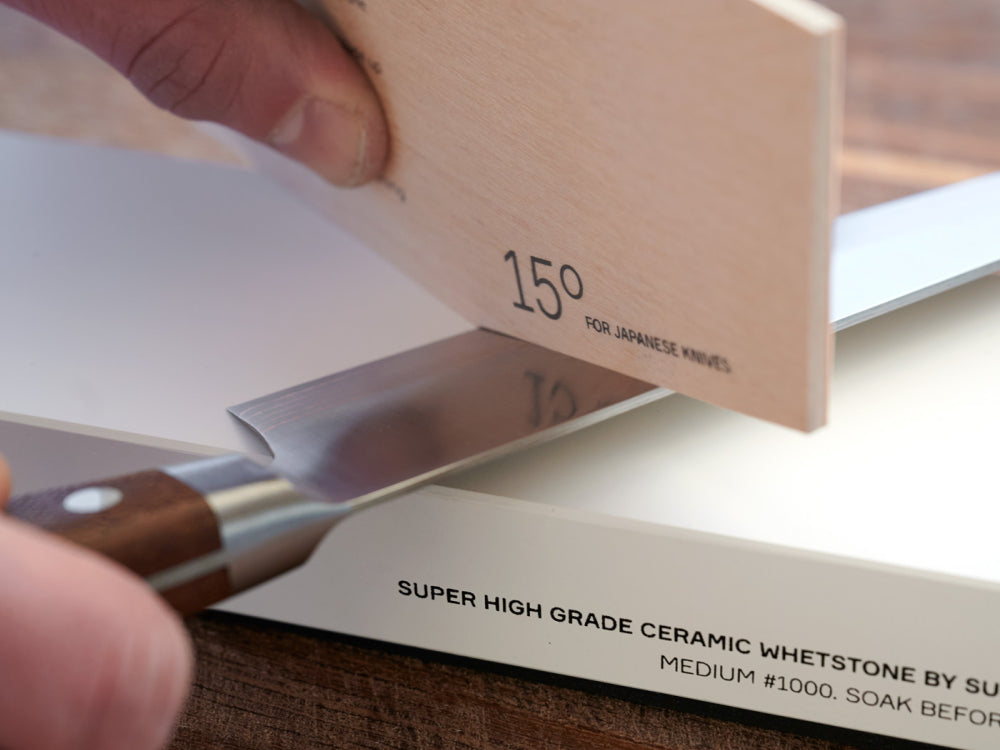
3. SET YOUR ANGLE
You must set the correct ‘edge angle’ between blade and stone. Then it’s important to keep the angle the same throughout the sharpening process. Not getting the angle right is perhaps the most common mistake.
Read more about what angle to sharpen a knife at here.
TOG whetstones come with a plywood ‘angle guide’ so that you can set up your angle correctly.
The exception to this rule is that the angle can be increased by a few degrees when using a polishing stone or a strop. This ensures you are working on the very tip of the cutting edge and creates a ‘micro bevel’.
4. CHOOSE YOUR STYLE
A) JAPANESE TRADITIONAL METHOD
Working with the stone upright on the bench, slide the knife up and down, grinding each section of the blade separately and pushing the blade down with two or three fingertips. This allows you to grind certain areas more than others (e.g. where there’s a chip or where you’re still trying to create a burr).

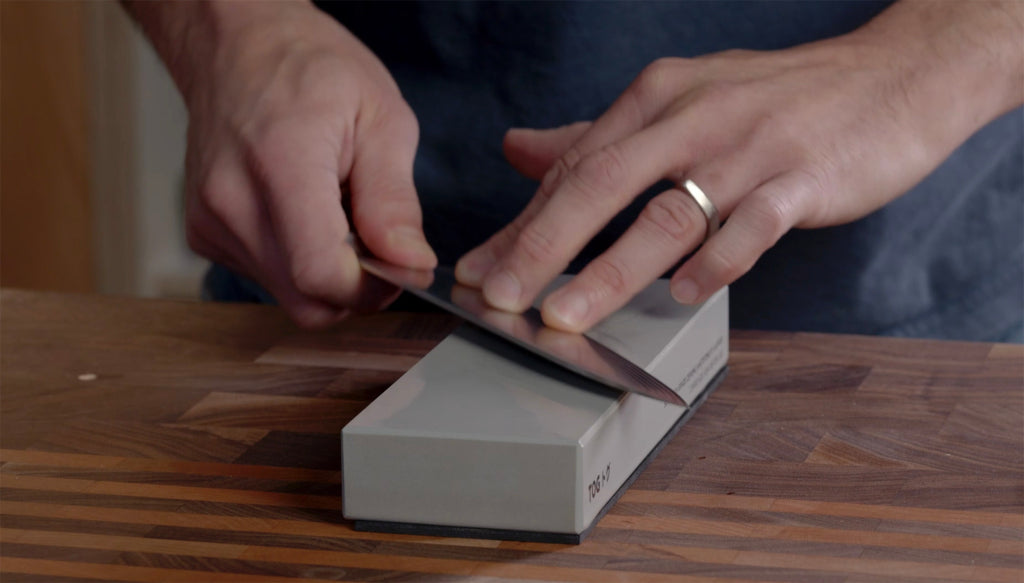
B) PULL METHOD
Holding the handle of the knife, drag the full length of the cutting edge diagonally across the stone, from tip to heel. This gives the most even result along the length of the blade.

When I’m sharpening knives, I tend to use the Japanese method to remove chips or to sharpen a very blunt knife and then I switch to the pull method to even out the work and create a bevel that is consistent along the whole length. Try both and see which you feel most comfortable and confident with.
5. KEEP YOUR WHETSTONE WET
I keep a shot glass of water nearby for when the stone starts drying out. Make sure that stone is always wet.
6. RAISE A BURR
Key to using whetstones properly is to sharpen until you can feel a ‘burr’ on the opposite side of the blade from the one you are sharpening. This can take a good few minutes with a blunt knife. The burr feels like a wire running along the cutting edge, because that’s what it is. When you feel it appear, that’s when you know you have created a new edge. You need to keep sharpening until you can feel the burr along the whole length of the knife. When you’re trying to create a burr, sharpening one side only will help (go for the side of the dominant hand), as flip-flopping from one side to the other tends to make it fall off.

7. REMOVE THE BURR
Make sure you’ve sharpened roughly the same amount on both sides and then remove the burr, or the knife won‘t cut. Do this by using a honing rod (around 6 strokes each side with firm pressure), or by running the edge firmly over some scrap wood (as if you were trying to cut it). Make sure the burr is gone and the knife is sharp before moving on to the next whetstone. Not creating and not removing the burr are two of the most common mistakes beginners make.
Removing the burr with a ceramic rod is only necessary after using a coarse or medium whetstone. When using a fine whetstone, swap a few times from one side to the the other and that should be enough to remove any burr formed.
8. KEEP CHECKING SHARPNESS
If your knife won’t cut paper, it’s blunt. As you go through the stages of sharpening, keep checking that your knife is getting sharper and sharper. By the time you’ve finished with the coarse whetstone and removed the burr, the knife should cut paper.
You can read more about how to test the sharpness of a knife here.
9. REPEAT WITH MEDIUM WHETSTONE
After having finished with the coarse whetstone, repeat the process with a medium whetstone. You should only need to work for about 1 minute each side. You can use the TOG ceramic honing rod afterwards to remove the burr and refine the edge from #1000 to #2000.
10. MOVE ON TO FINE WHETSTONE
If you have one, use a fine whetstone to refine your edge further. You only need to do this for 1 minute either side maximum. Do NOT use a steel or ceramic honing rod afterwards.
11. FINAL POLISHING
After a fine whetstone, you can use a polishing whetstone (eg. Belgian Blue with the slurry washed off) or a leather strop to create a 'shaving sharp' edge. Read more about how to make a knife really, really, really sharp here.
12. FLATTEN YOUR WHETSTONES
Having a flat whetstone makes sharpening easier, especially for straight edge knives. Rub your whetstone (with water) on an extra coarse diamond plate or a whetstone ‘fixer’ until it’s flat. If you have two individual whetstones you can also rub them together under a tap. The water will stop them sticking together.
13. DRY AND STORE YOUR WHETSTONES
Soaking stones can take up to two days to dry. Dry them properly before storing them to avoid moisture-related damage to the stone or the box. Splash-and-go stones should dry in a few minutes.
13. MAINTAIN YOUR EDGE
You should only have to get your whetstones out about once or twice a year at home if you look after your knives and maintain their edge with a honing rod or ‘steel’. The TOG ceramic honing rod works by gentle sharpening (with its #2000 grit surface) and also by straightening (honing) the cutting edge (as tiny bits get bent over in normal use).
Hold the rod vertical on a non-slip surface and sweep the blade down, from heel to tip, with medium pressure, about 5 or 6 times each side. Set the angle between blade and rod to the knife’s edge angle.
At home, doing this once a week is enough. Chefs will do this every day.
Read more about how to use honing rods / steels here.
STILL FEELING UNSURE?
This may all sound like a lot to take in, but I do encourage you to have a go and to persevere. I'm telling you, it's worth it!
If you're after some more inspiration have a read of our Secrets of a Professional Knife Sharpener where Scott McLellan talks about his first experiences of sharpening knives.
And finally...
Good luck!
TOG SHARPENING GUIDE

Browse our articles on knife sharpening to learn from scratch or hone your skills.
TOG SHARPENING PRODUCTS
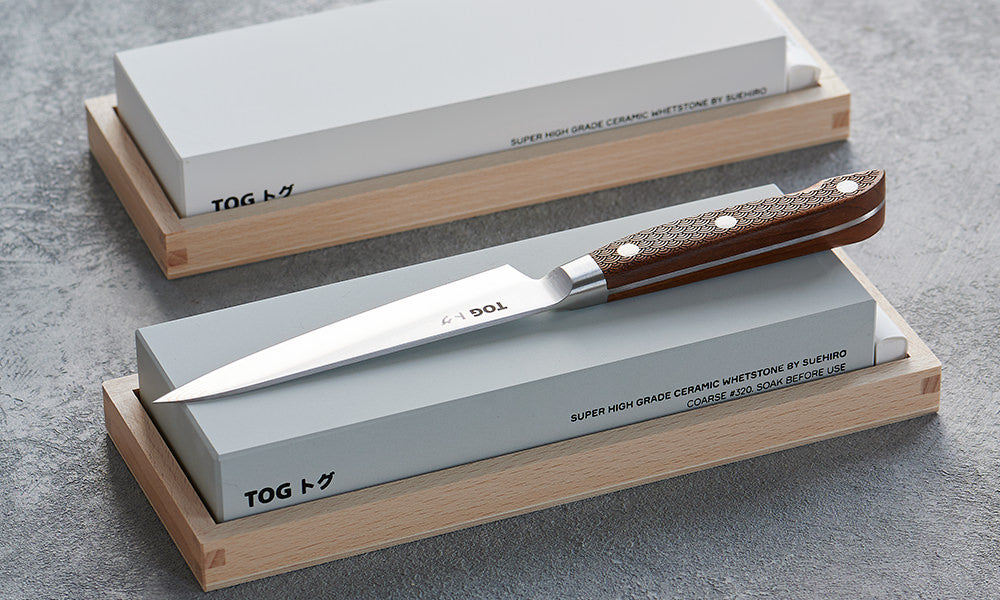
We have created what we believe is the best range of sharpening products possible.

